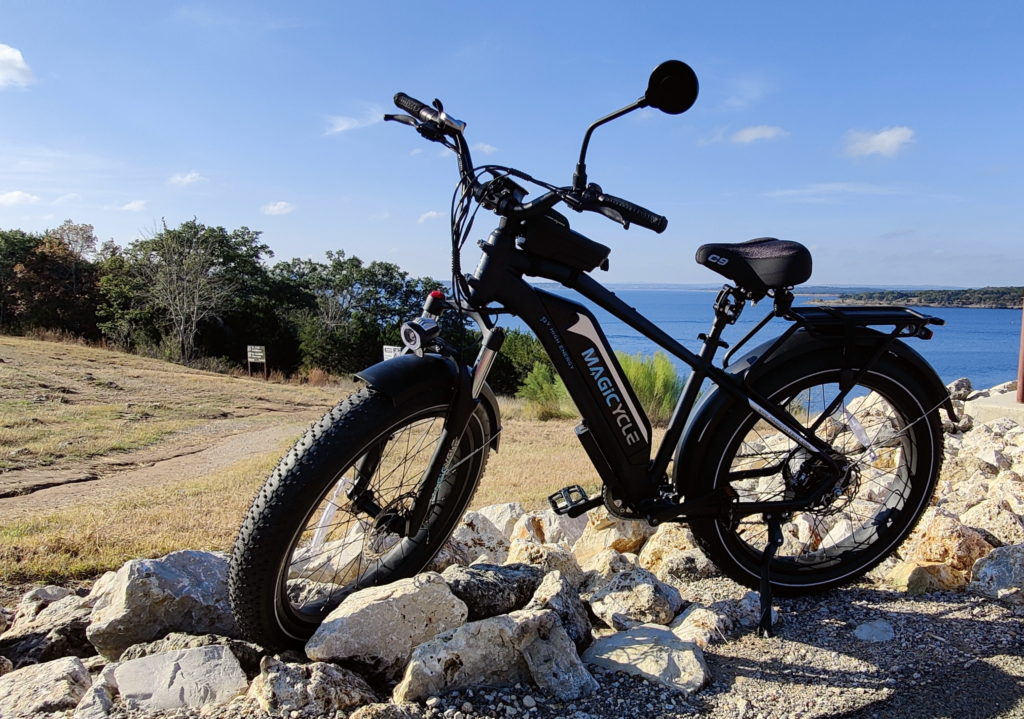
The big day has finally arrived! Magicycle works diligently to be prompt with the shipping, but even so, after your Magicycle has crossed the ocean and reached the Magicycle warehouse in California, it naturally takes several days for the shipping company to deliver your e-bike. While you wait, you can prepare and be ready to do a great job of unboxing your Magicycle and getting it ready to ride! Your new ride will be delivered soon in a big box looking something like mine:

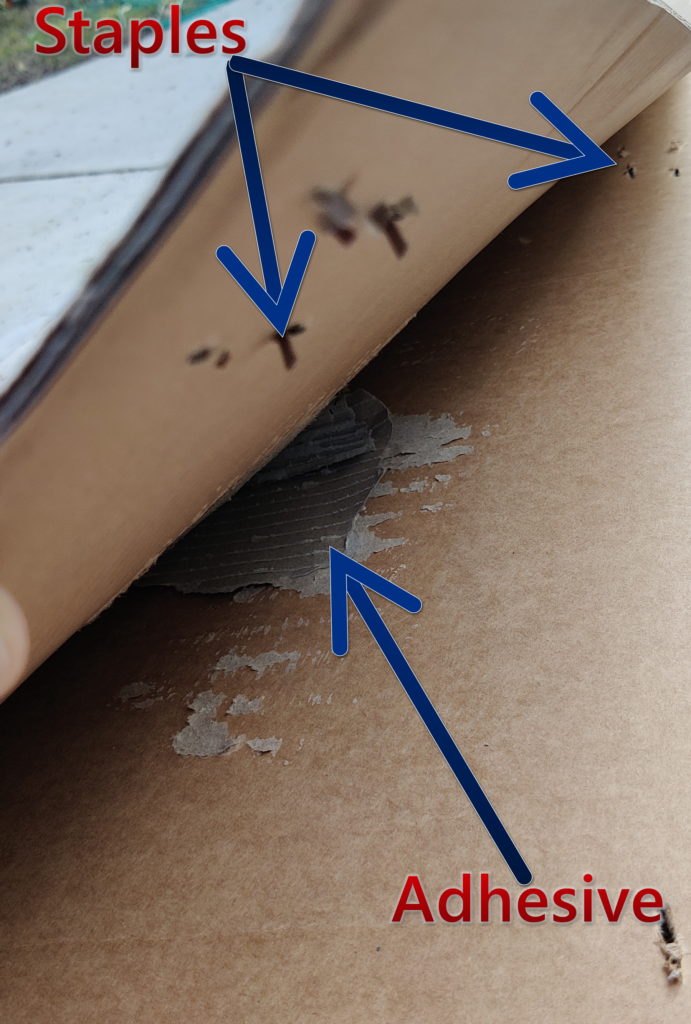
The shipping box was damaged, as shown above, but Magicycle does everything possible to anticipate rough handling by shipping company employees. For example, notice the heavy-duty support added to the box…

10 Easy Steps to Unboxing and Assembly
Let’s get your Magicycle out of the shipping box!
STEP ONE
Gather the needed tools. Magicycle provides every tool needed for assembling the e-bike, so all you need right now is a pair of snips to remove the yellow straps around the box and the zip ties you will find inside the box. Yes, you could use a knife, but that’s much more risky to both you and your Magicycle!
STEP TWO
Turn the shipping box upside down. Then snip and remove the yellow straps and open the upper end of the box. Work carefully — the staples are sharp. Note that the lid is secured with both staples and with adhesive.
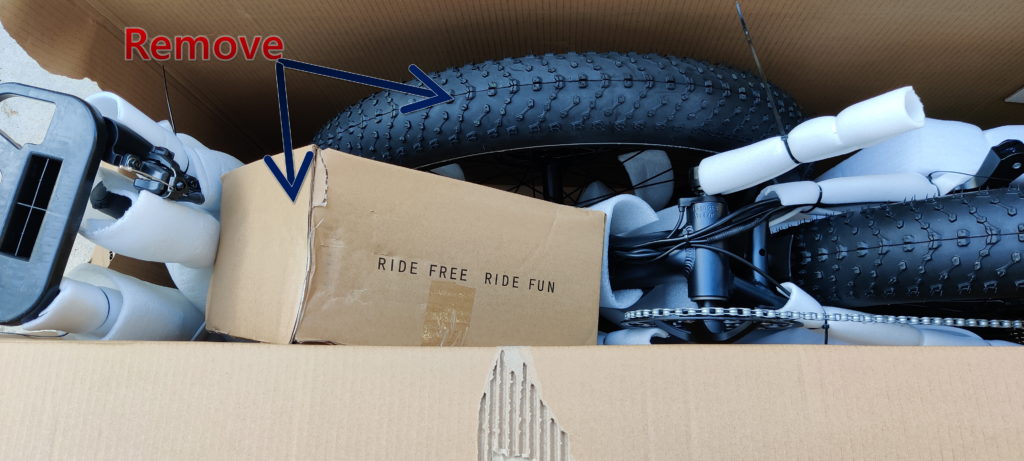
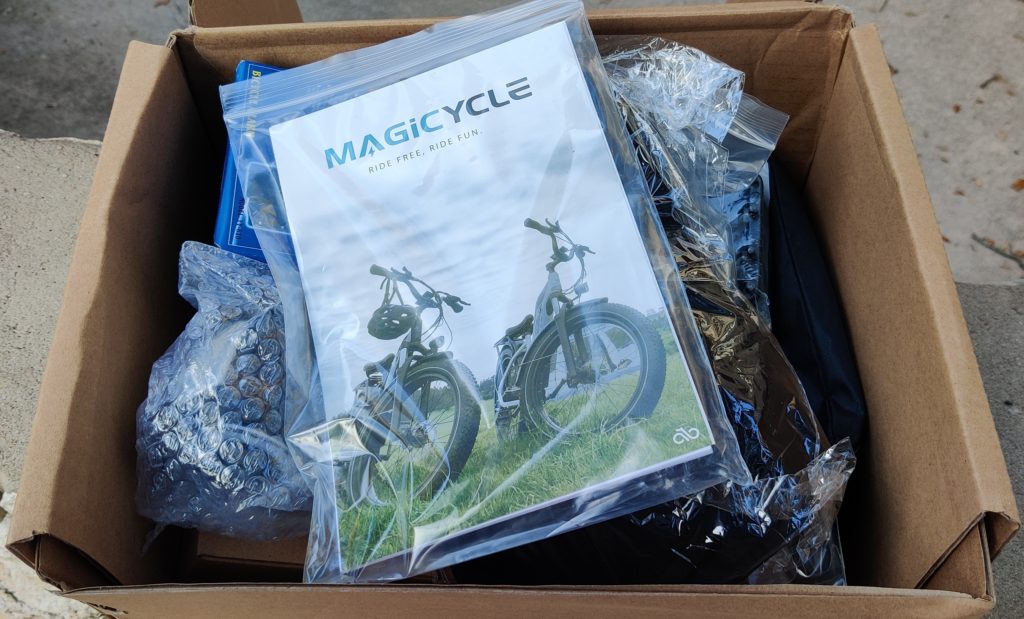
After opening, you now you have this view of the contents:
STEP THREE
Remove the Accessories Box and the Front Wheel. You’ll find lots of goodies in your Accessory Box, and the contents may vary slightly with each shipment.
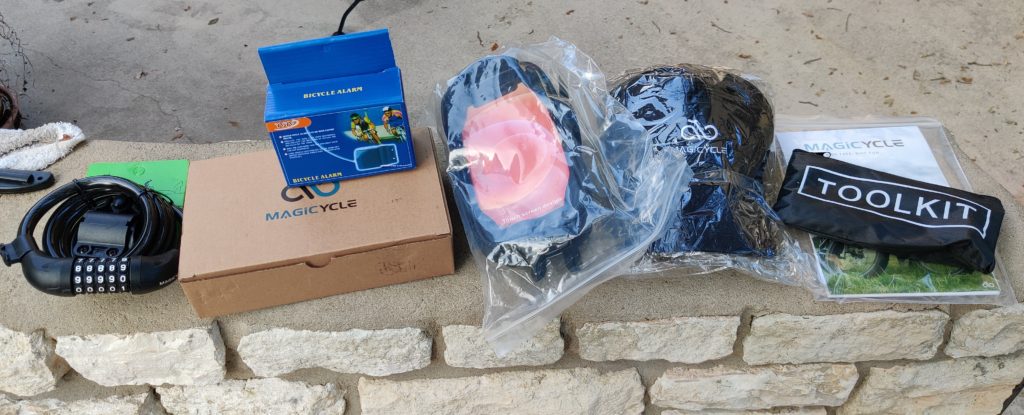
Locate your owner’s manual in the Accessories Box and use it as needed during the assembly process.
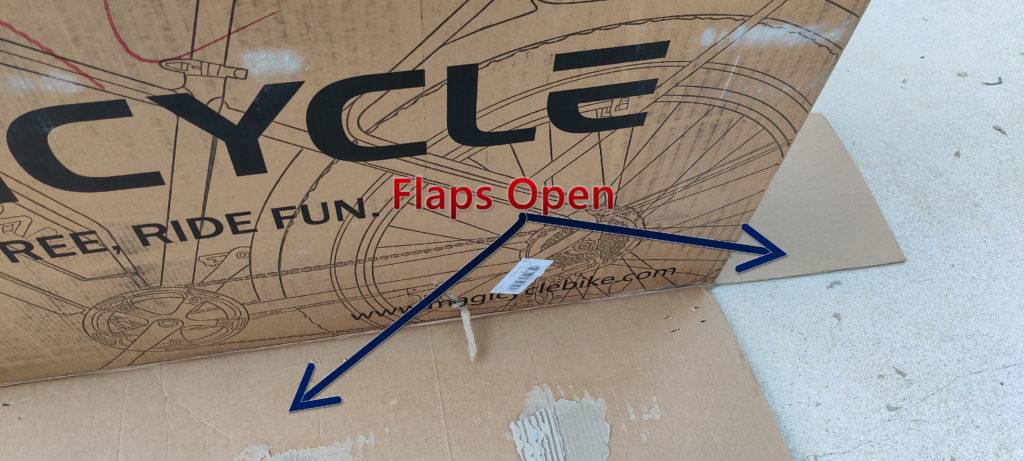
Allow the shipping box lid flaps to remain OPEN and carefully lower the box to one side until it is lying flat on the ground.
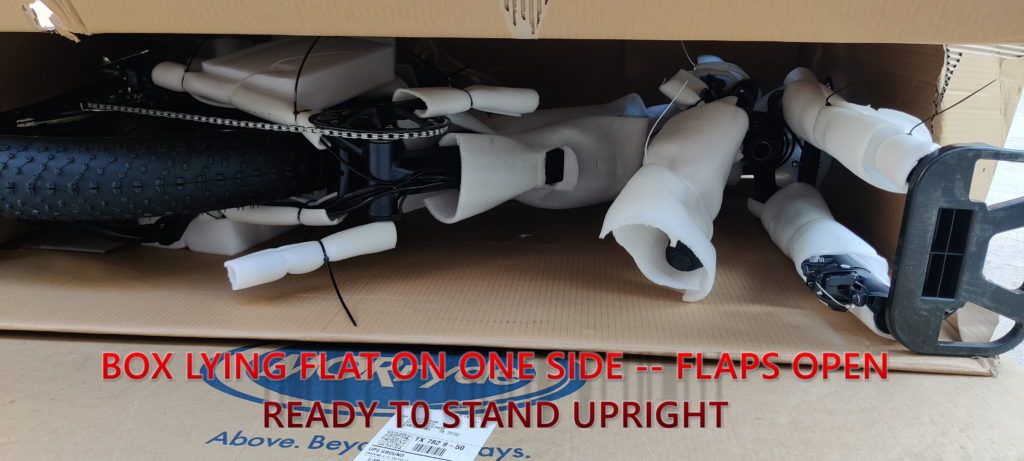
Then stand the box up again, this time restoring it to the original right-side up position, but with the box lid flaps on the bottom of the box remaining open.
STEP FOUR
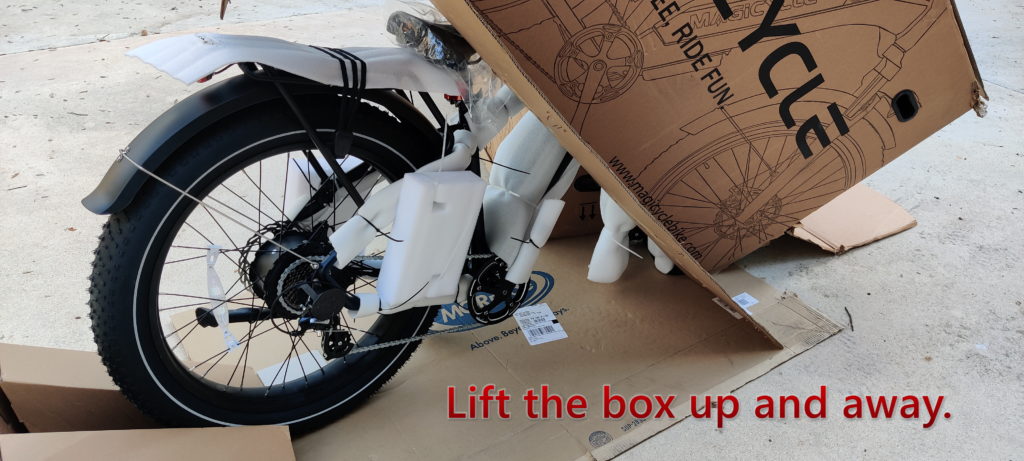
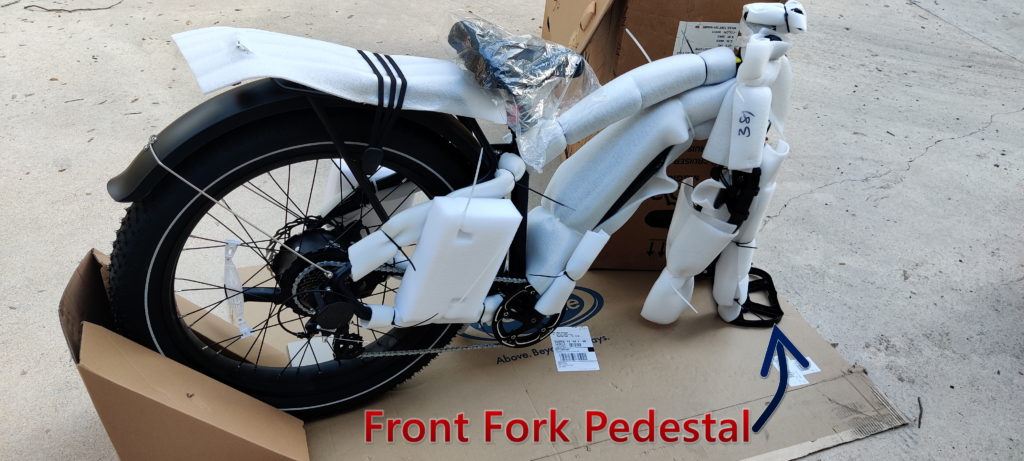
Ensure that the box is stable and will not tip over. If needed, get someone to assist you. Now carefully lift the box straight up, leaving the e-bike supported by the front fork pedestal and the rear wheel. Take care that the e-bike is stable, and again, if needed have someone ready to assist you.
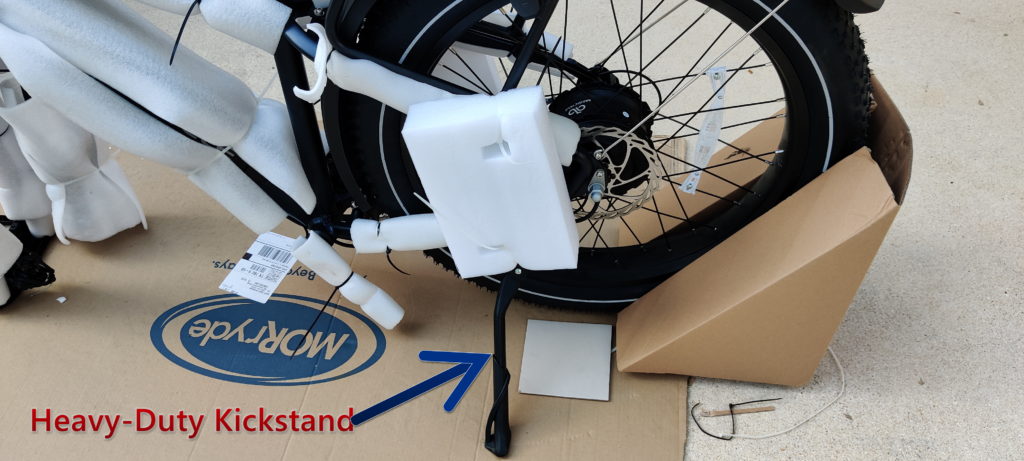
Now remove the zip tie and protective wrapping from the kickstand and open the kickstand.
DO NOT REMOVE the zip ties and protective wrapping except as needed for installing the handlebar and front wheel. They will continue to protect the finish of your Magicycle while you complete the assembly.
STEP FIVE
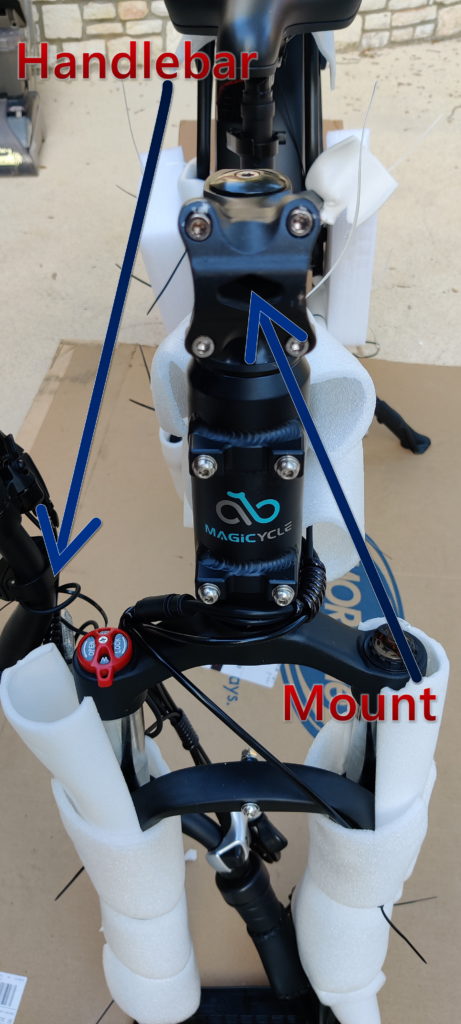
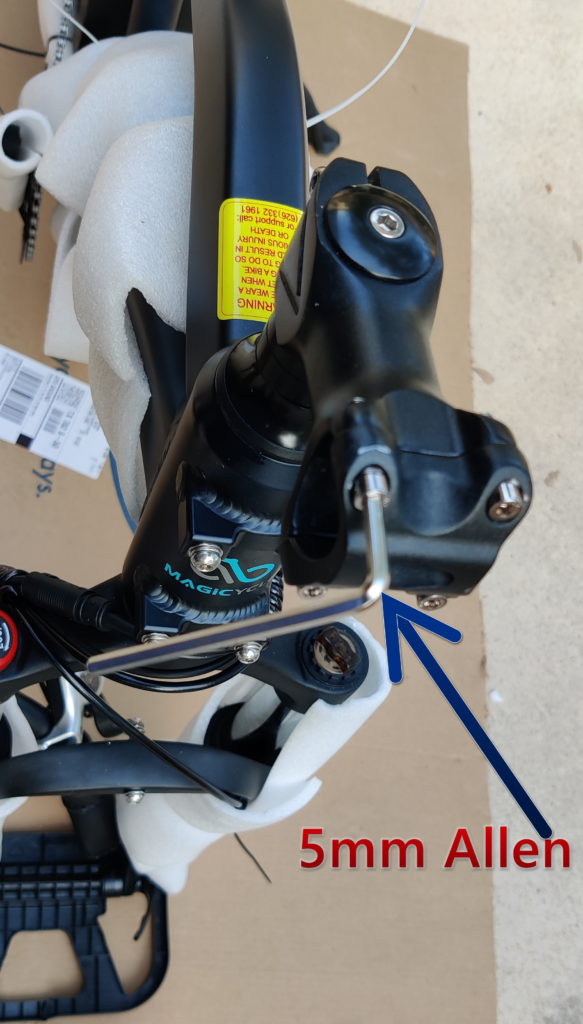
Notice how the Magicycle is very carefully protected. Although the shipping box had obviously been handled roughly, my Magicycle arrived in perfect condition — not a scratch on it. With the Magicycle unboxed, you can now begin the assembly. Your Magicycle is shipped 90% assembled, so you need only to install the handlebar, front wheel, front fender, headlight, seat, and pedals. Let’s begin with the handlebar, involving only 4 screws. Get the 5mm Allen from your Magicycle Tool Kit — loosen the 4 screws and open the handlebar mount. Place the handlebar into the mount and replace the clamp and screws. Leave the screws just slightly loose so that you can more easily adjust the position of the handlebar later.
STEP SIX
Now you are ready to install the front wheel. Begin by removing the protective wrapping from the front fork.
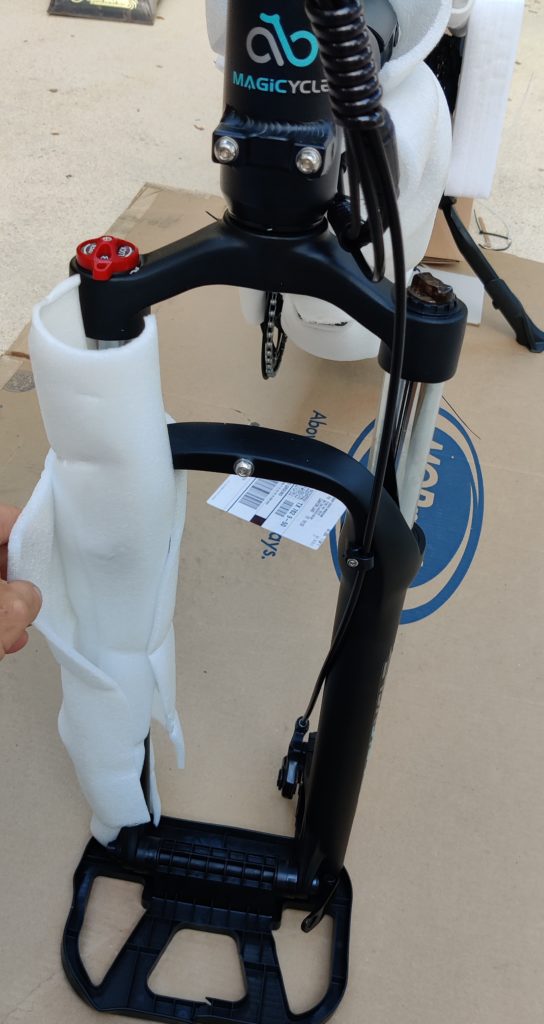
Then remove the Fork Pedestal by opening the Quick Release Clamp and removing the plastic nut on the opposite end of the axle.
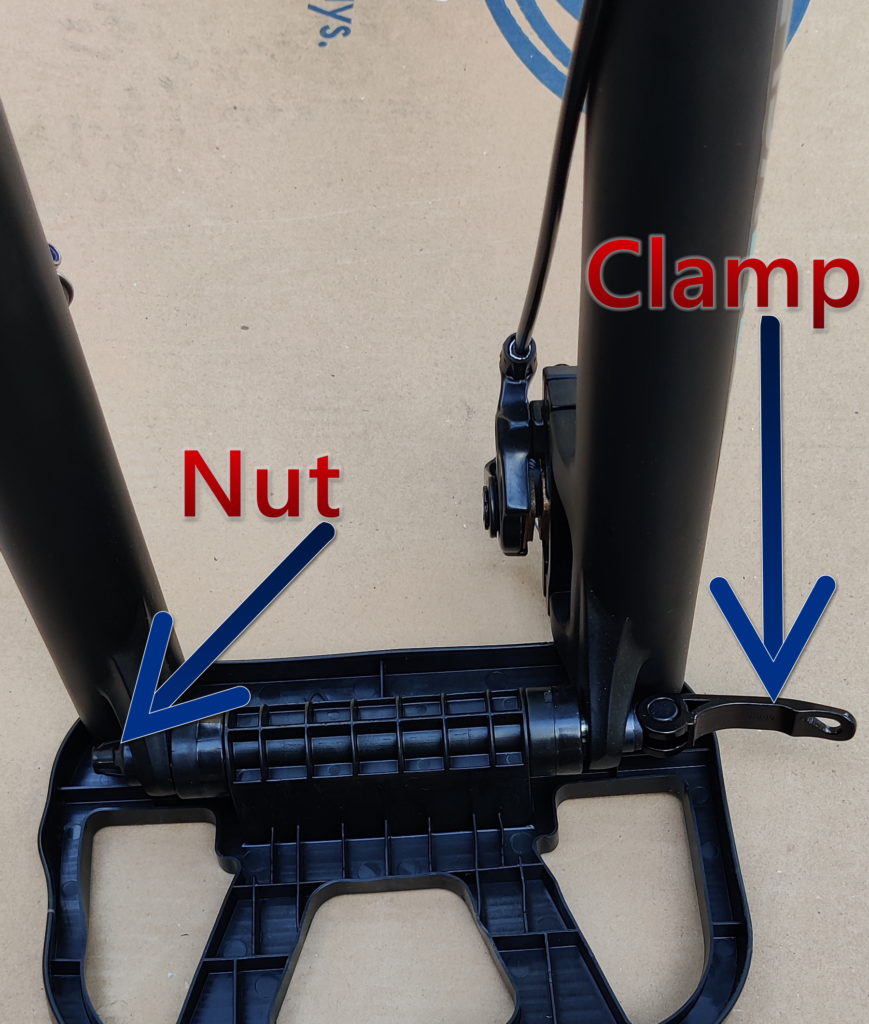
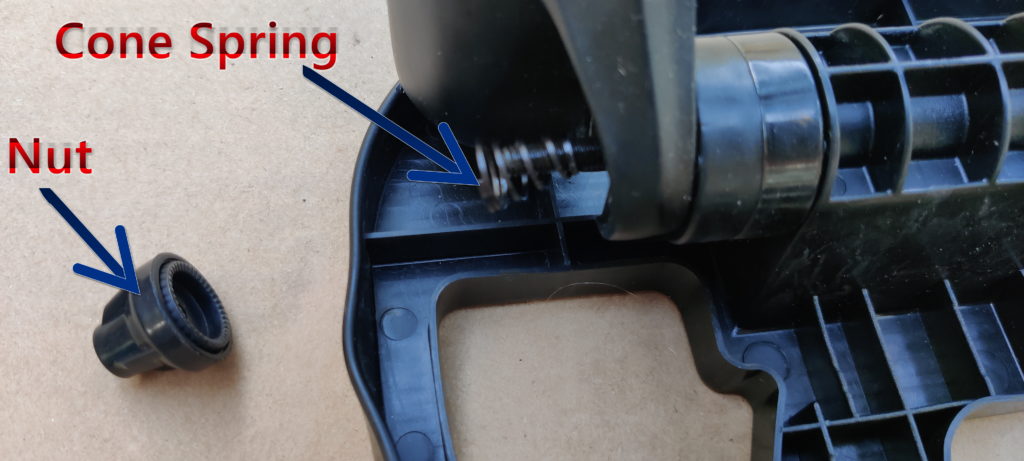
Carefully slide the axle out and set aside the axle, nut, and cone springs in proper order. These must be replaced in exactly the same position after your front wheel is in place (small end of the cone springs points toward the wheel).
You can complete the front wheel installation by yourself, as I did, or better yet…get someone to assist you. Lift the front fork while you move the front wheel into place. Carefully ensure that the disc brake (already installed on the wheel) is inserted between the brake pads.
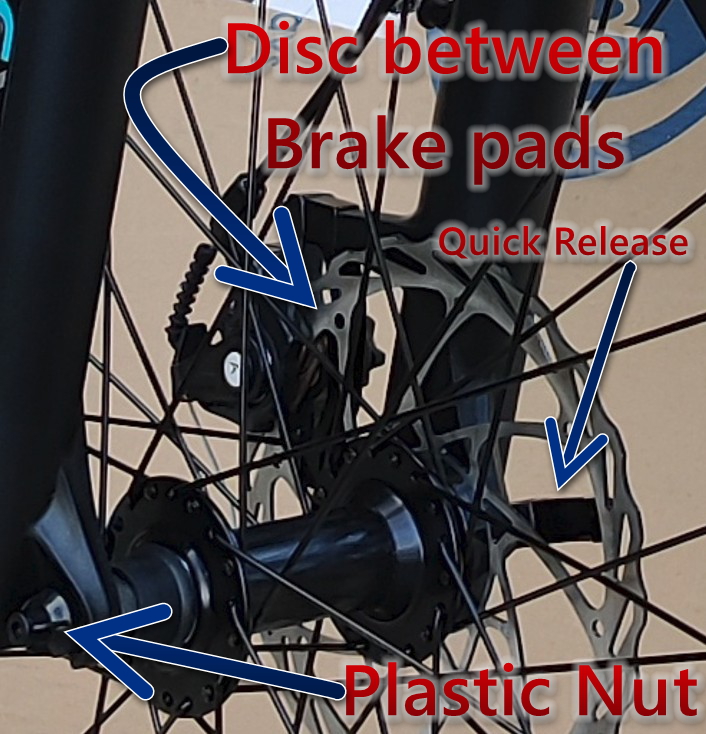
Grasp the plastic nut firmly and spin the Quick Release to tighten. When it is moderately tight, close the Quick Release. Now spin the wheel to discover whether there is any noise caused by the disc brake rubbing against a brake pad. If so, follow the instructions in your Magicycle manual to adjust the brakes. If you have already decided to upgrade your brakes, instructions can be found here.
When you are satisfied that the wheel is spinning freely, you can fully tighten the Quick Release. It should be somewhat difficult to close.
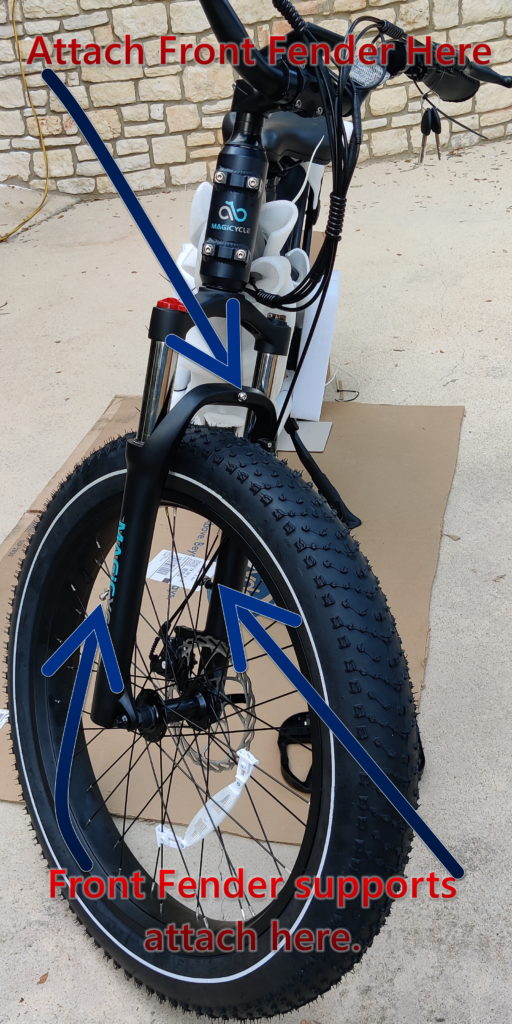
STEP SEVEN
Prepare to install the front fender. Alternatively, if you prefer to not have fenders, you can remove the rear fender. Tighten the mounting screw only moderately, and then attach the fender supports.
STEP EIGHT
Install the headlight, using the same attachment point as for the front fender. Use the 5mm Allen.
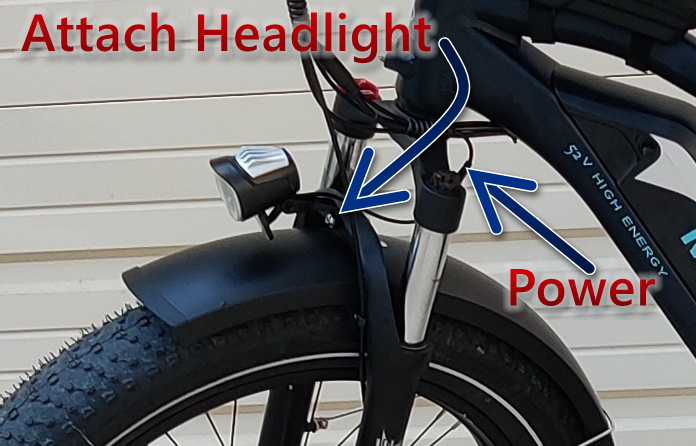
Now spin the front wheel to check for any rubbing noise made by the tire contacting the fender. Adjust as necessary, and then complete the tightening of the fender/headlight mounting bolt.
STEP NINE
Install the seat and pedals. Remember that the left and right pedals are threaded in opposite directions…spin them toward the front wheel.
STEP TEN
Double-check the tightness of all mounting points and check the position of all items attached to your handlebar. Then read these precautions.
ENJOY YOUR NEW RIDE! Check the available Magicycle accessories for items you want to add to your e-bike.