The Juin Tech M1 hydraulic brakes seem perfectly suited for upgrading your mechanical brakes. They are highly recommended, and easy to install — just be sure to get the M1 version.
The toolkit that came with your Magicycle has everything needed for the upgrade, with the exception of a wire-cutter/crimping tool such as this one. You will also need a couple of cable caps — here is an example.
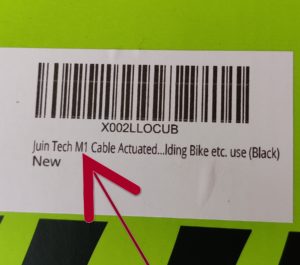
Again, be sure to get the M1, which will look like this:


There are a few parts included that you will not need, but keep them for possible future use; For installation on your Magicycle, you can use the disc rotor and the spacer that are already on your e-bike, further simplifying the installation.
Here are the steps for upgrading your brakes
:
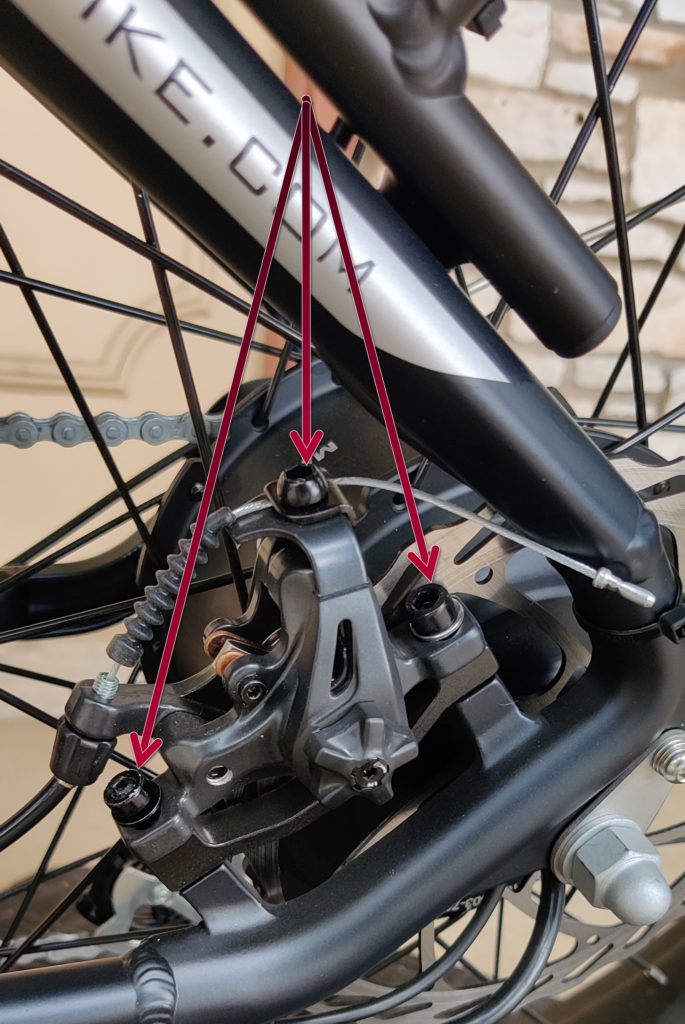
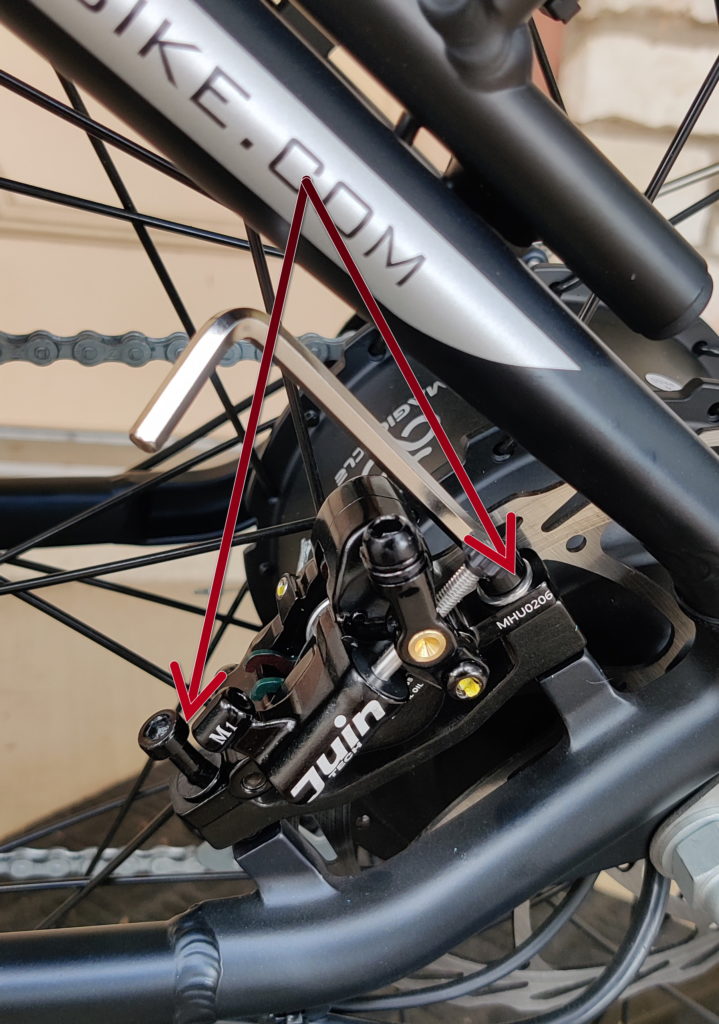
First, locate the screws you need to remove for uninstalling the original brakes, shown below:
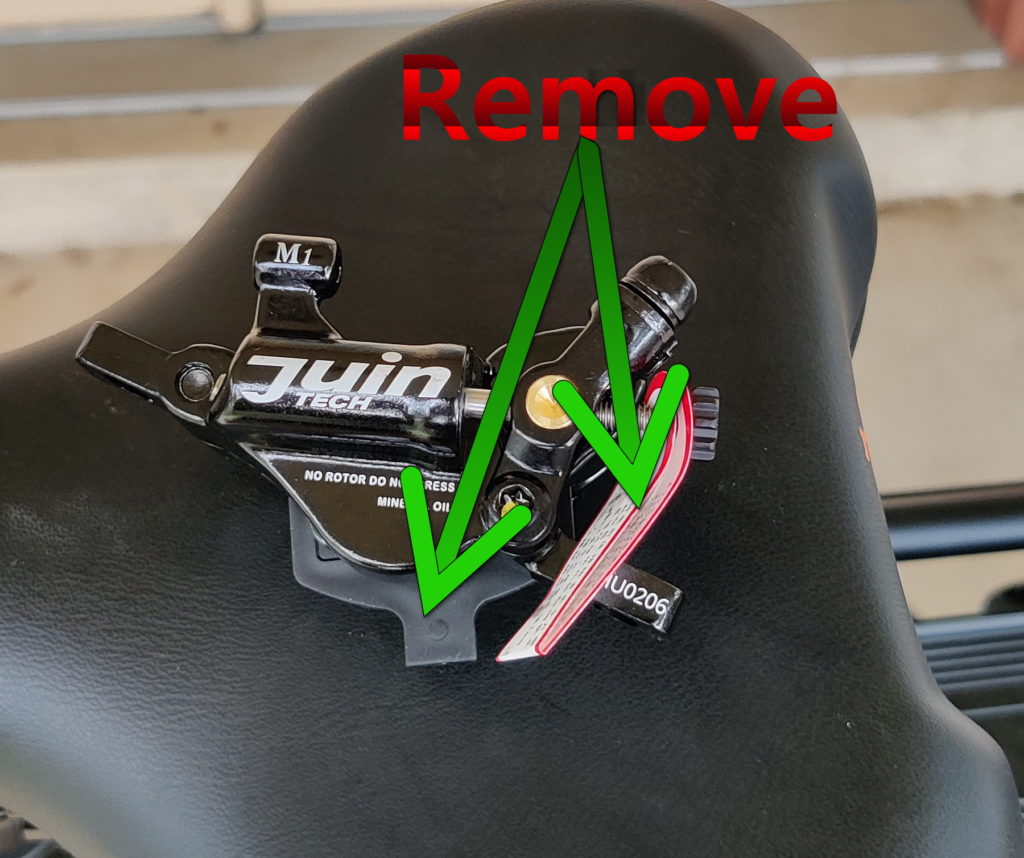
Use a wire-cutter to remove the cable cap from the brake cable: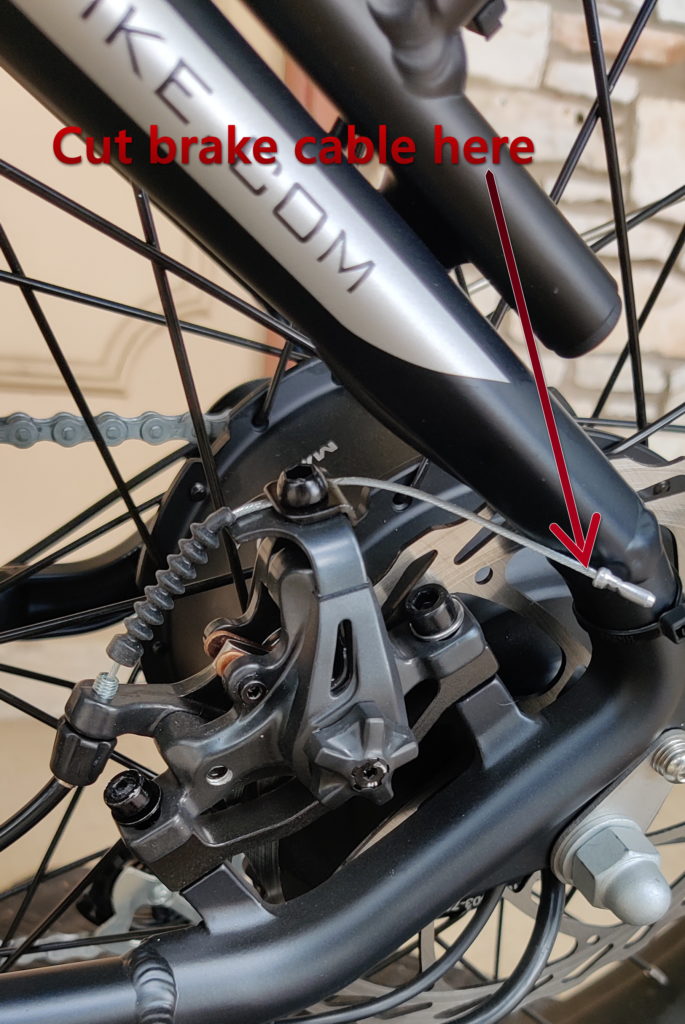
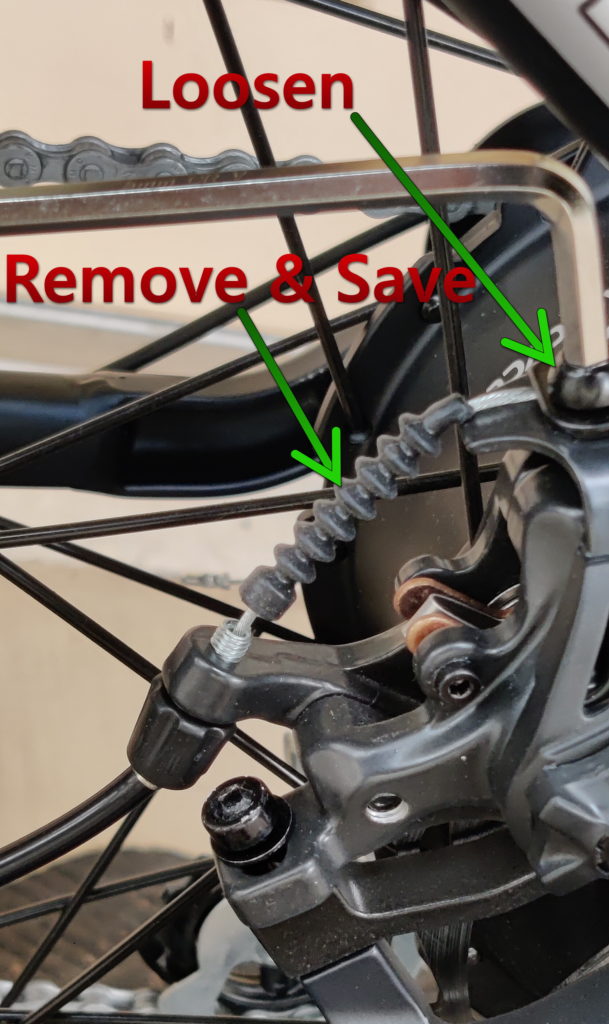
Now loosen the cable clamp screw; pull the cable loose and remove the cable boot for reuse.
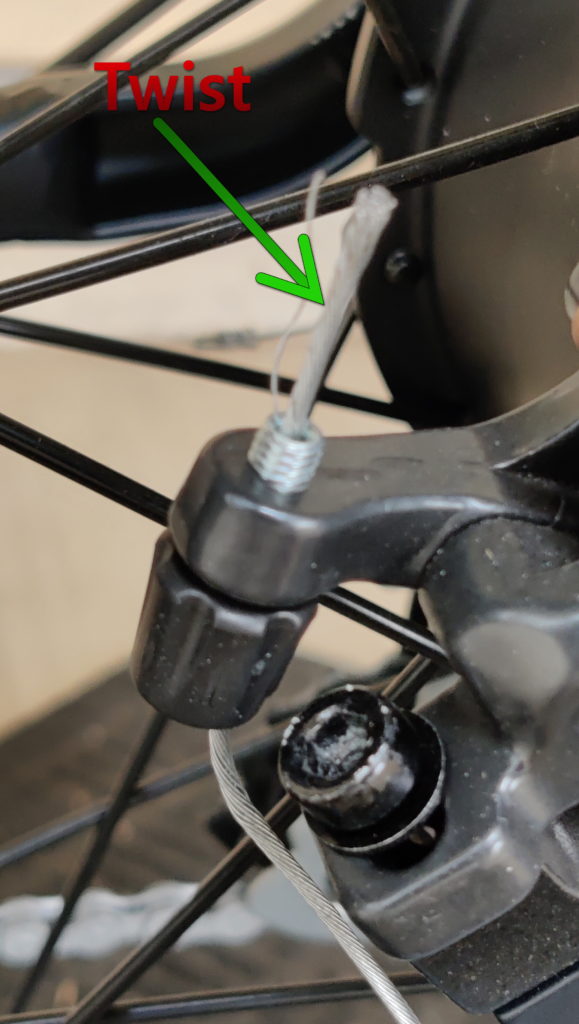
If necessary, twist the cable end to prevent fraying of the wires:
Note the exact placement of the screws shown below. You will reuse these screws, and they must be reinstalled in exactly the same location.
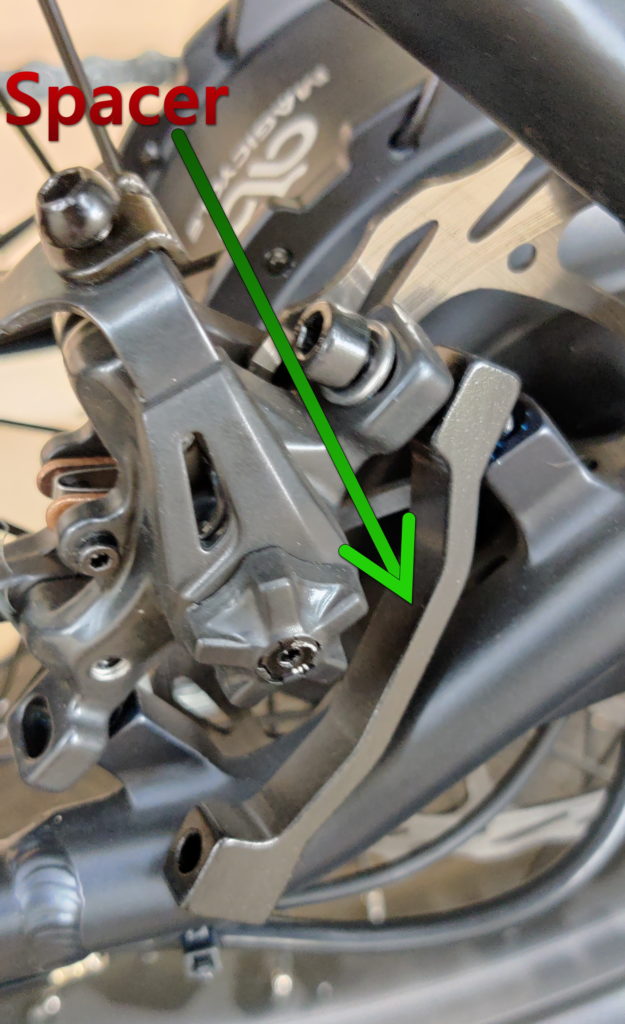
As you remove the original brake, note the exact placement of the spacer. Return the spacer to the same position with the new brake. Use a 5mm Allen to remove/replace the mounting screws.
Take a moment to remove any debris left behind.

This is a good time to clean your rotor, using a bicycle-specific disc brake cleaner or isopropyl alcohol, ensuring there is no dirt or oil on your rotor. Now you are ready for the new brake. Remove the tag and protective insert.
While grasping the brake gently (do not squeeze), insert the correct screw through one of the mounting holes and carefully insert that same screw into the spacer…making sure the spacer will be in the same position as originally mounted.
Then very carefully slide the brake pads over the disc brake rotor and into mounting position.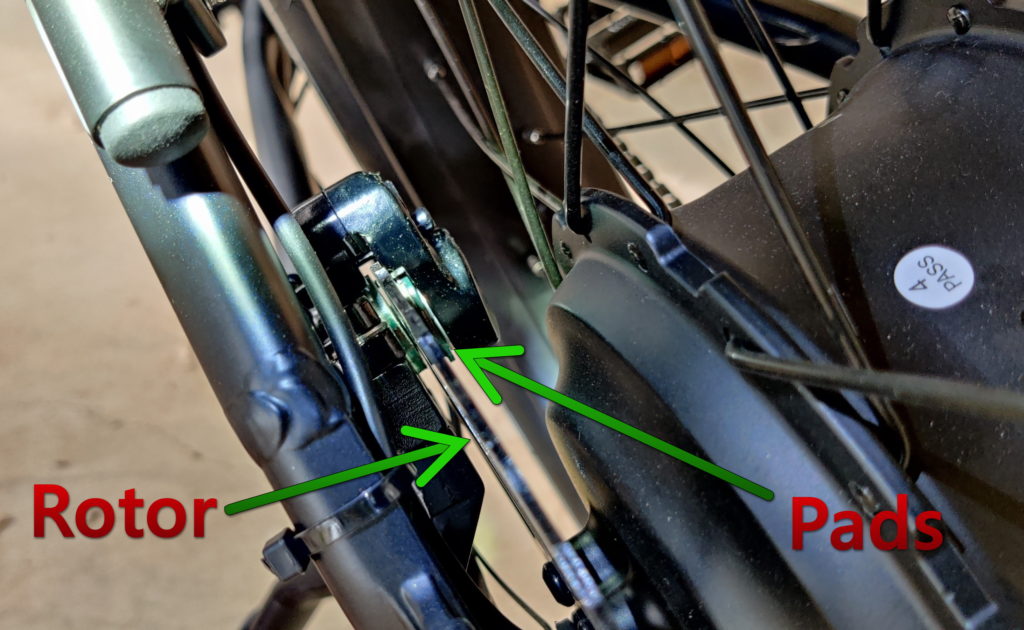
Tighten the screw a few turns and then insert the second screw and tighten a few turns. Continue tightening the screws, a few turns on one and then the other, alternating until each screw is getting close to tight but you can still wiggle the brake a couple of millimeters.
Now you are ready to reinstall the brake cable. Taking care to not let the wires fray, thread the cable through the cable holder tube as shown below. Be sure to seat the metal fully into the cable holder tube. It may require firmly pulling the cable closer to the bracket.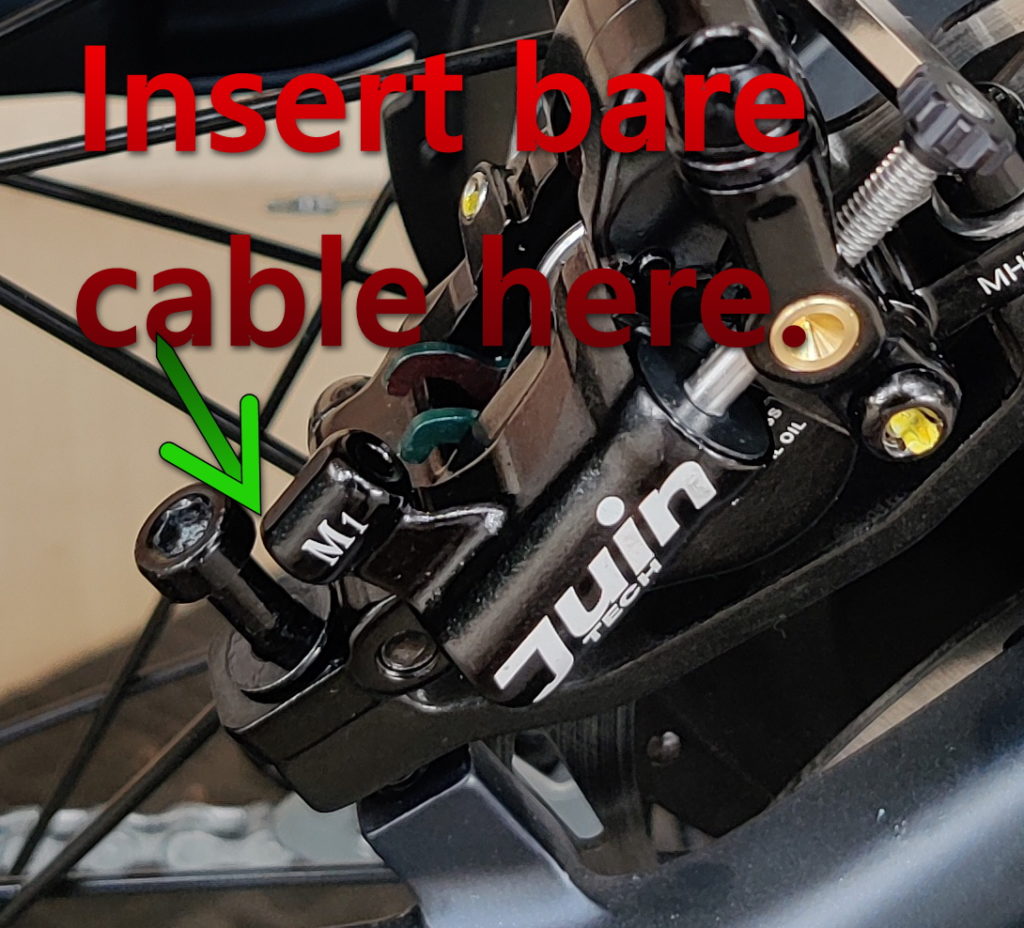
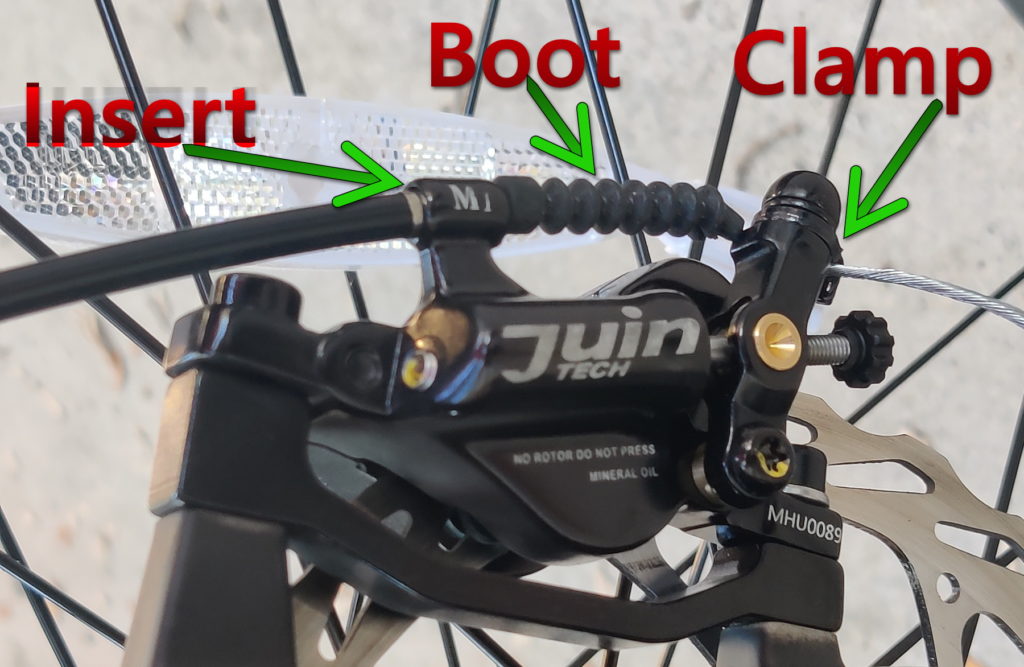
Thread the cable through the boot that you removed from the original brake. Loosen the cable clamp and thread the cable through the clamp. Pull the cable tight with one hand while you tighten the clamp screw with the other hand.
Then reach up to the handlebar and firmly squeeze the brake lever, holding it tight while you complete the tightening of the two mounting screws. Squeezing the brake lever will center the brake pads on the disc. After tightening the screws, check to be sure the brake body has not shifted. If it has shifted, loosen the appropriate screw just enough that you can apply enough pressure with your fingers to move the brake back into place. Tightly hold it in position while you tighten the screw again.
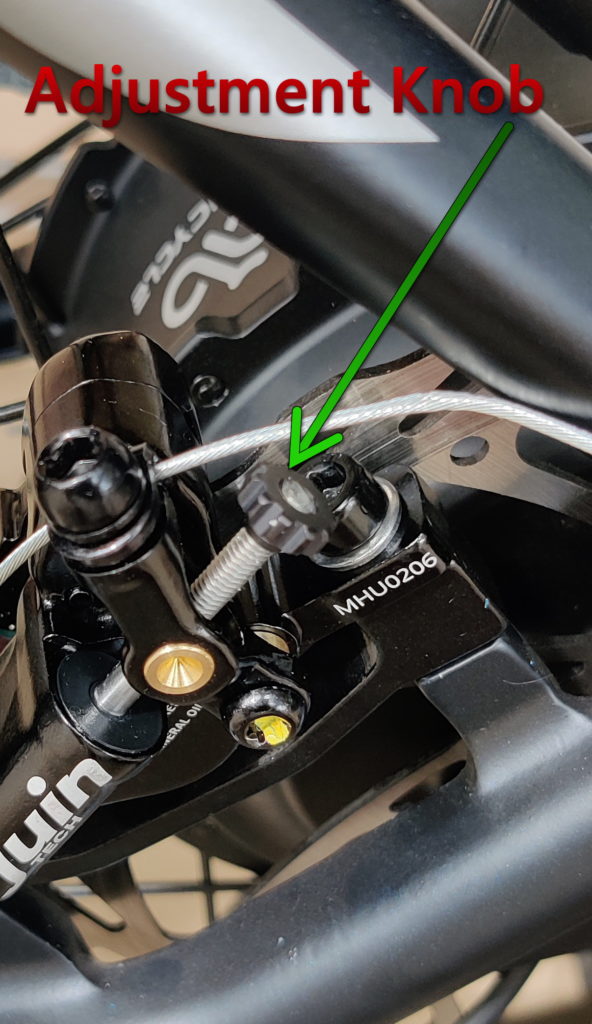
Now spin the wheel, checking to see that it spins freely and with no brake noise. If necessary, use the brake adjustment knob to fine tune the position of the brake pads. When the wheel spins freely and quietly, you have a successful installation and you are ready to upgrade the brake on the other wheel, following the same steps.
After installation is complete, walk alongside your Magicycle, pushing it quickly while you actuate each brake to be certain you have stopping power. Then you are ready to bed-in your new brake pads.
Find a long stretch of road, and a slight downhill grade is preferred. Ride slowly and make a final check to be sure your brakes easily bring you to a stop. Then build your speed to about 20mph, lightly apply your brakes for 4-6 seconds and then firmly bring your Magicycle to a full stop. Repeat this procedure 8 to 10 times, and now you are ready to ride! If you are new to e-biking, please discover safety tips here.
DISCLAIMER
You are responsible for the proper and safe installation of your brakes. If in doubt, take your Magicycle to a bike shop and ask them to install or check your brakes. Your use of the above installation guide signifies your acceptance of this disclaimer and your agreement that Magicycle bears no liability or responsibility for damage or injury resulting from any error or omission in this installation guide. Additionally, the author assumes no responsibility or liability for any errors or omissions in the content of this site. The information contained in this site is provided on an “as is” basis with no guarantees of completeness, accuracy, usefulness or timeliness,