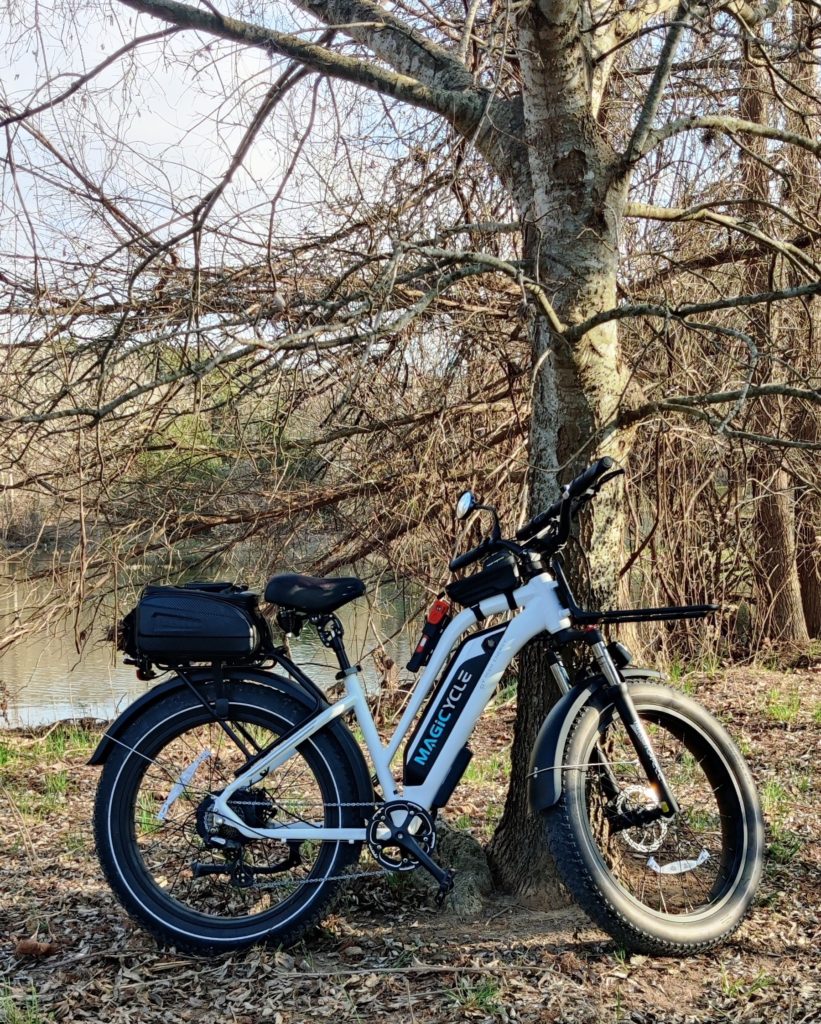
Front Rack with Typical Magicycle Excellence
I love the convenience of having a bike bag on my rear rack, but I often missed having a good place to strap on items that are not appropriate for the bag or are just too large. Solution? Add a front rack to your Magicycle!
You can use this link to buy your front rack, and then follow these step-by-step pictorial installation instructions:
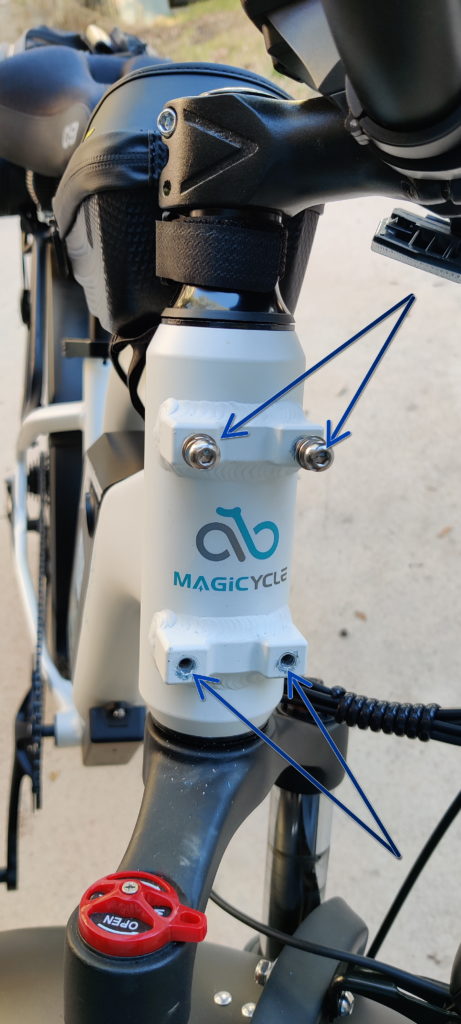
- Locate the Allen wrench in your Magicycle tool kit and remove the four screws from the mounting point.
2. If you want to relocate your headlight to the front of your rack, remove the headlight now. If your primary headlight is mounted on your handlebar, you may prefer to skip this step. Again, the tools are provided in your Magicycle tool kit.
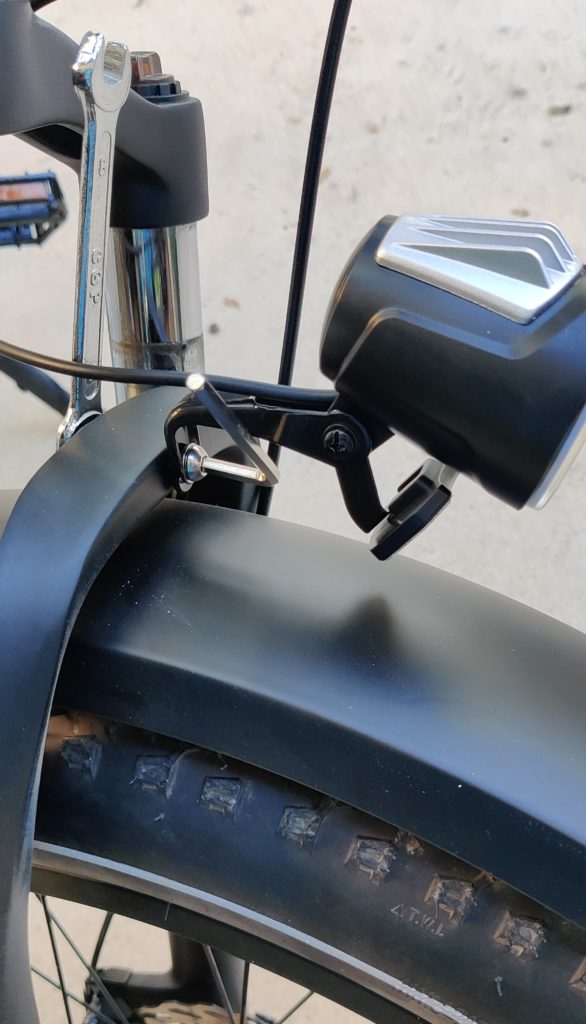
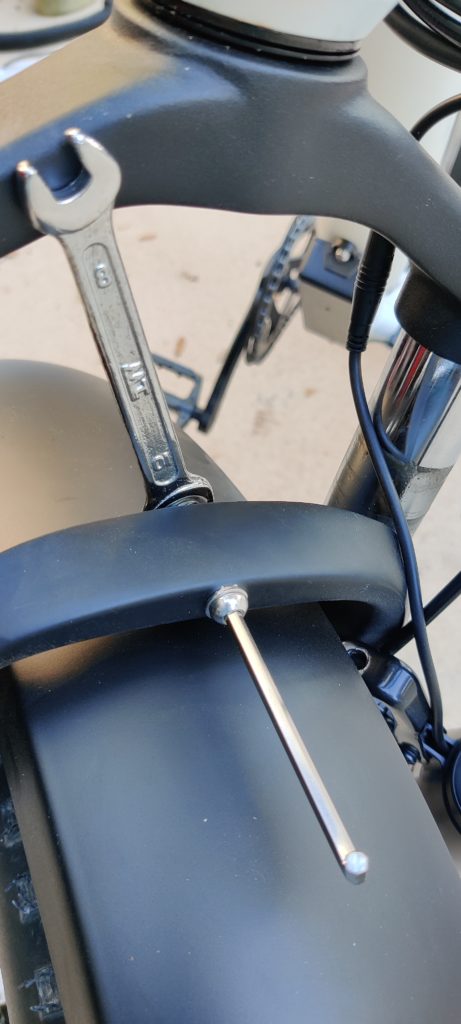
3. If you removed the headlight, carefully position and reattach the fender.
If you decided to move the headlight to the front of your rack, now is the time to locate the extension cable which Magicycle provides with your rack. Carefully unplug your headlight wire and plug in the extension. After the rack is installed, you can route the headlight wiring to the front and attach your headlight.
4. Pick up two screws and loosely attach your front rack to the mounting point. This will keep your rack secure while you add the other two screws. Tighten one screw moderately, then do the same with the screw in the opposite corner, and then likewise the remaining two screw. Now follow the same pattern, tightening each screw firmly.
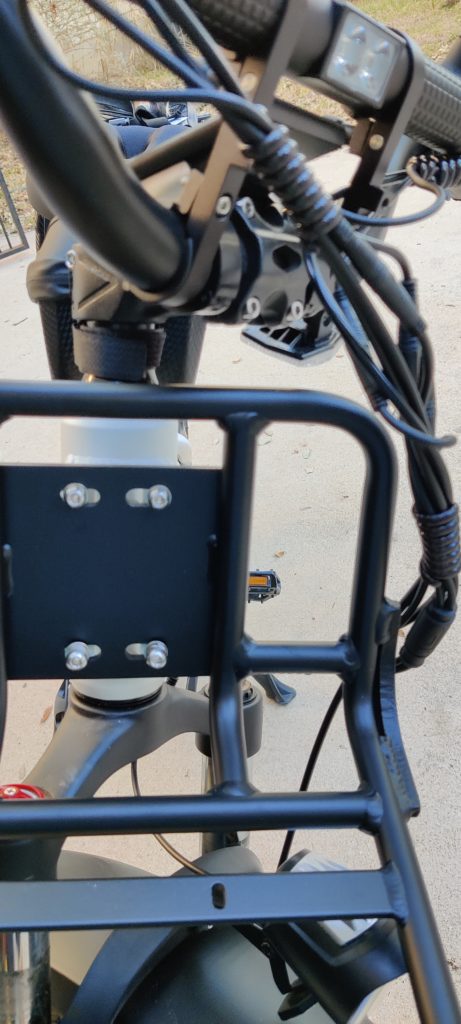
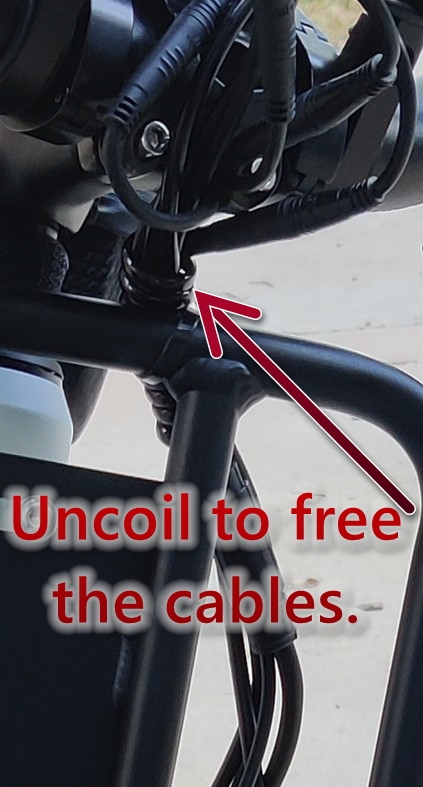
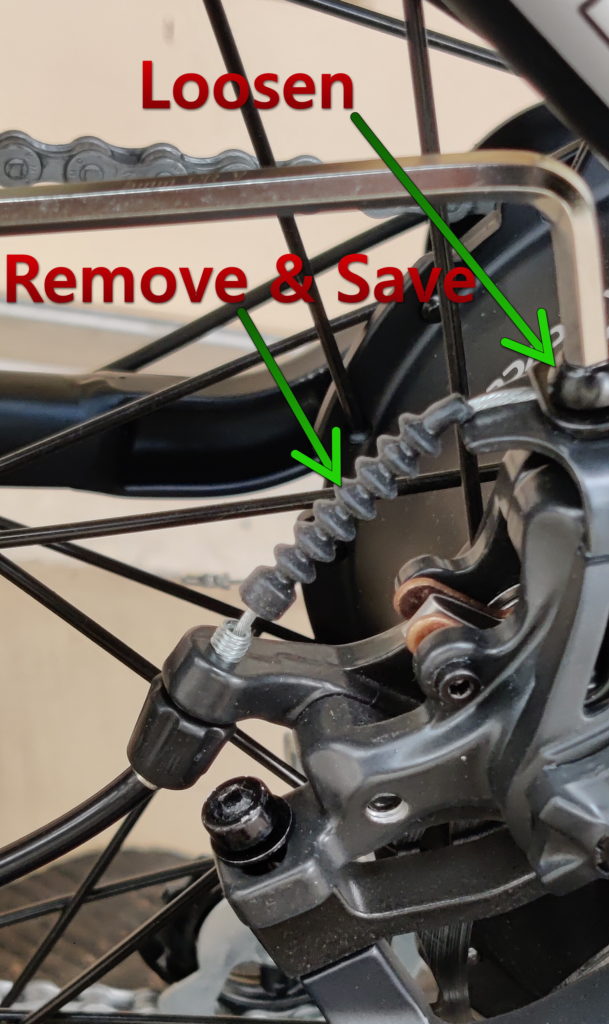
5. Now you have a decision to make. You cannot safely ride your Magicycle until you route the wiring, because you cannot adequately steer to the right. You may want to re-route all the interfering wiring and bring it through rack just below the mounting plate. I chose to re-route only the front brake cable, which greatly simplifies the task. In this case, all that is needed is to cut the end of the cable, loosen the set screw, pull the cable from the brake and re-route it as shown.
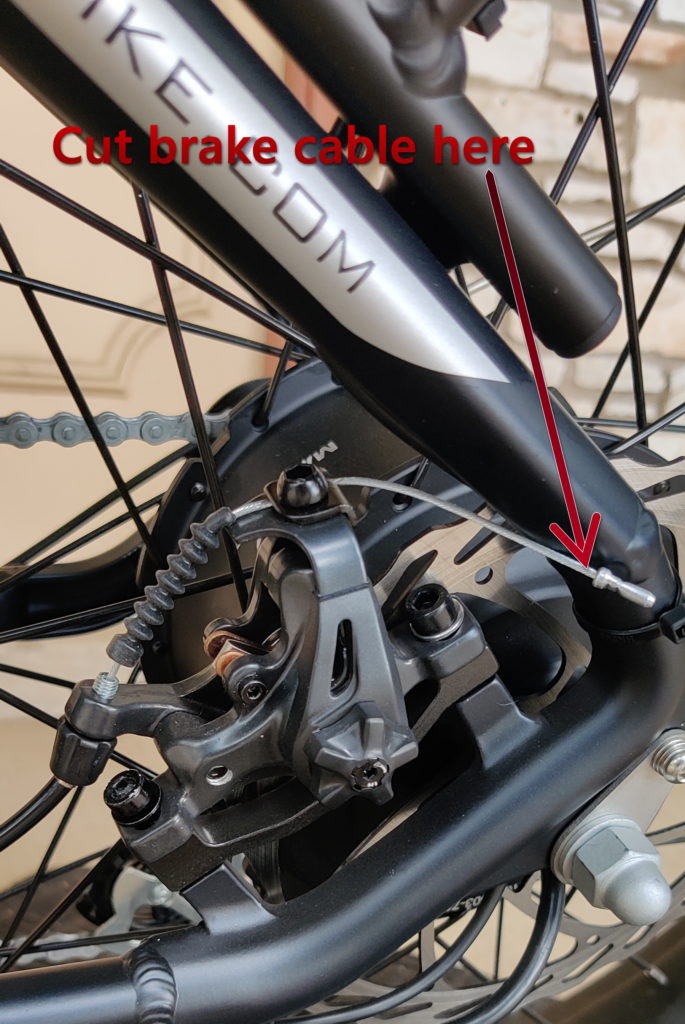

Click Here for more about brakes and brake cables.
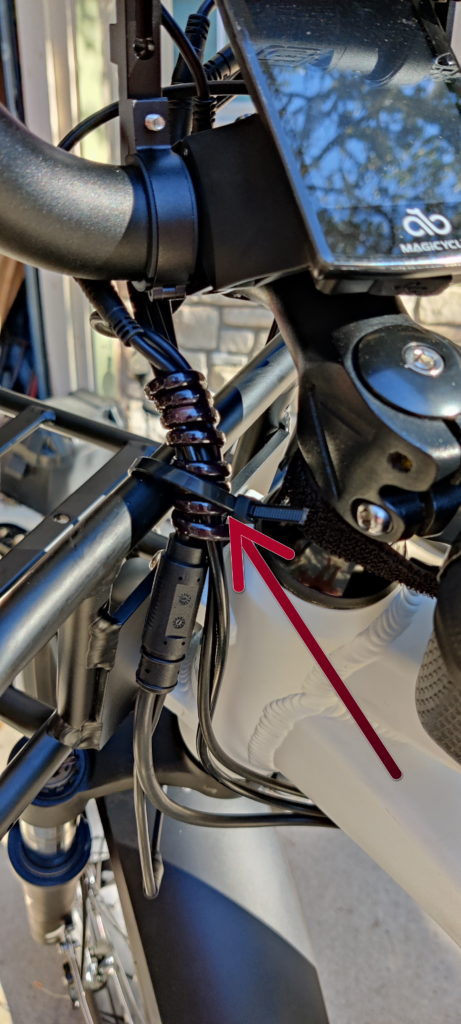
6. Zip-tie the remaining cables to the center of the top bar on your rack.
That’s it! Not too bad a job, right? Now turn your handlebars fully to the right and left, just to be certain the proper steering range is available. Congratulations on a successful installation of your new Magicycle Front Rack!